
Roasting and Peeling Chestnuts

Chestnuts are one of the reasons we look forward to fall. Apples arrive first, followed by pumpkins, and, then finally, chestnuts! The soft, velvety, and delicately sweet chestnut meat just melts in your mouth; they are such a satisfying snack! It’s a lot of work to pierce the raw nuts and then peel them once they come out of the oven, but it’s well worth the effort.
The chestnuts available at Oryana come from Bachi Farm in Williamsburg. They are smaller than the chestnuts you will find at other grocery stores, which makes them a little harder to work with. They are more difficult to hold while you cut them; your fingers get tired from grasping them firmly so as not to cut yourself while you’re scoring the skins. And they are harder to hold while peeling.
We experimented with a batch of chestnuts to see if soaking the scored nuts in water for 1 hour before roasting them offered any advantage, as one website suggested. We also roasted a batch without soaking. It turns out that soaking does make the shells come off a little easier, but the difference wasn’t huge, so we would skip this step next time.

Tips for roasting chestnuts:
Keep your chestnuts refrigerated until you’re ready to roast them so they stay fresh. To prevent the nuts from exploding in the oven you have to cut vent holes into the shells. Use a sharp paring knife or a serrated steak knife. The steak knife worked best for us. We also tried using scissors, as one Youtube video demonstrated. We just used regular office scissors, not special kitchen shears. You simply hold the bottom blade against the cutting board and slowly pull down the top blade over half the chestnut with lots of pressure, cutting through the shell but avoiding the nut. Then turn it around and do the same to the other side. When it came time to peel these, the shells came off easily. But the scissors method was very tiring on our hands, so we switched back to using the steak knife.


The standard advice is to cut an ‘X’ into the flat side of the chestnut. We mostly did this, but we also tried scoring all the way across a nut from stem to stern. The nuts where we used this cut were the easiest to peel. Every website says to only cut the shell and avoid cutting the nutmeat, but it’s almost impossible not to cut into the meat a little, so don’t worry about it. It’s also much easier to rest them on their flat side and cut the curved side, so that’s what we did. If you cut the Xs vs. one longer cut, the bigger the Xs are, the easier they will be to peel later.

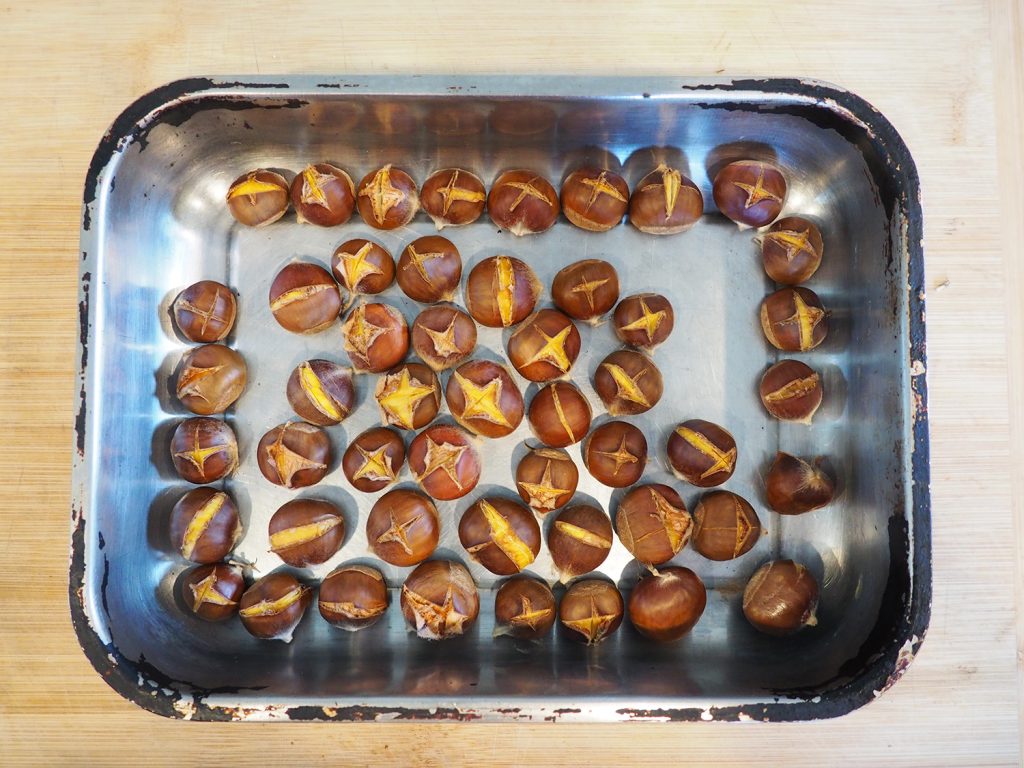
Many recipes recommend an oven temp of 425°F but we roasted ours at 400°F for 25 minutes. When a sharp knife slides easily into the nutmeat they’re done.


When the nuts are done, have a clean dish towel ready on the countertop. Pour the nuts onto the towel and cover the nuts to keep them warm. Use another dish towel or cloth napkin to hold them and start peeling them. They are easiest to peel when they are warm. If you let them cool down all the way they may be much more difficult to peel. Just pull the shells away through the towel. If all goes well, they should slide off relatively easily. You can use a nut cracker on stubborn or very small nuts, but be careful not to crush the whole nut.


Sometimes, even though you do everything right, they will be hard to peel. Or the shell may come off but not the skin. This can be one of the most frustrating experiences in the world of food prep! If this is the case, try simply breaking them in half and scooping out the nutmeat with a spoon.
If you have a tried and true method of preparing chestnuts, please let us know!